|
 Bill's Inspection Hatch - I took Bobby's technique one step further by installing three 6" ID inspection hatches. The way I see it; Bill's Inspection Hatch - I took Bobby's technique one step further by installing three 6" ID inspection hatches. The way I see it;
- "Tech Tip D03 talks about inspecting the gudgeon bolts and other fasteners on the inside of the transom. It suggests climbing into the port cockpit locker and contorting around to get into position to see/work on stuff mounted to the inside of the transom. Not this 6’1”, 280 pound sailor Ain’t gonna happen!"
With 3 inspection hatches installed I have reasonable access to the outboard, gudgeon and ladder mounting nuts, all without working up a sweat. Bill Ward. |
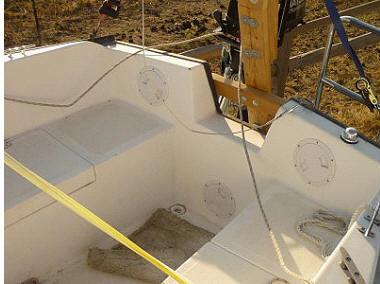
 UPDATE Panache Inspection Hatch (2025) - Late this Fall I too installed a 6" ID vinyl inspection hatch on Panache to check all the hardware inside the transom: nuts for outboard bracket & backstay chain plate, cockpit speaker, outboard wires and the gas hose. It's just too much effort to reach this stuff doing the "cockpit crawl" over the cockpit drain hoses. I was given a 5" ID hatch but it's not quite large enough to slip my arm through to shoulder depth. My shoulder requires a 6" ID hatch to reach those things. The rest of the hardware (rudder gudgeons & port chain plate) are fairly easy to reach from the cockpit locker. That locker needs to be cleaned out every once in a while anyway! UPDATE Panache Inspection Hatch (2025) - Late this Fall I too installed a 6" ID vinyl inspection hatch on Panache to check all the hardware inside the transom: nuts for outboard bracket & backstay chain plate, cockpit speaker, outboard wires and the gas hose. It's just too much effort to reach this stuff doing the "cockpit crawl" over the cockpit drain hoses. I was given a 5" ID hatch but it's not quite large enough to slip my arm through to shoulder depth. My shoulder requires a 6" ID hatch to reach those things. The rest of the hardware (rudder gudgeons & port chain plate) are fairly easy to reach from the cockpit locker. That locker needs to be cleaned out every once in a while anyway!
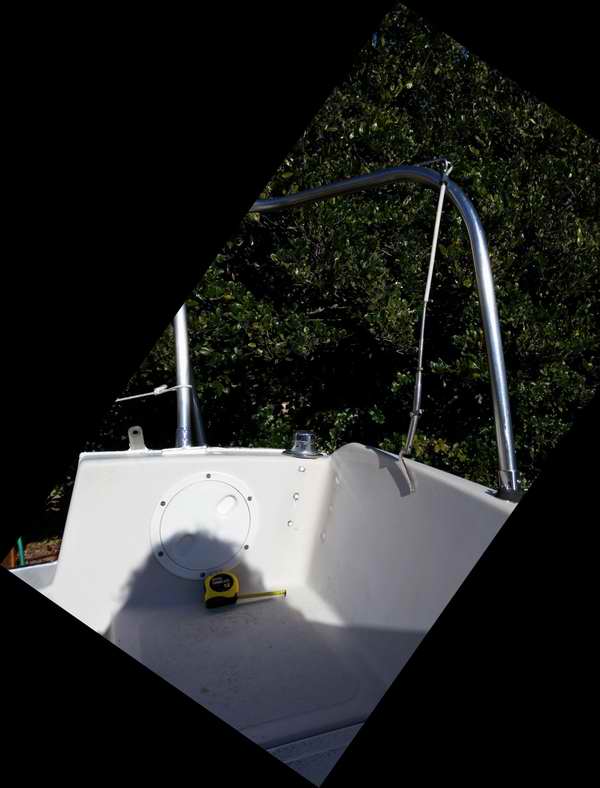
The location shown at right is lined up with the outboard bracket and close to where I cut the hole. This vinyl hatch has a seal on the cockpit side, outside the thread, to keep water out. It works especially well if the thread is lightly coated with silicon grease.
- Construction - While the fibreglass coaming is 1/4" thick here, I backed up the edge of the hole with a 1" wide 3/4" thick wood ring on the backside of the coaming. This ring of 3/4" thick plywood added sufficient stiffness. This is likely unnecessary but I have a habit of building everything to withstand WWIII. In addition, the wood screws imbedded in the wood ring can't snag my arm on the way out of that hole. Dang that would hurt. The wood ring is coated with G-Flex epoxy to protect against rot and sanded smooth for all the obvious reasons. If I were to paint it I'd use Bilge Coat. That stuff leaves a nice smooth finish.
- Alternatively, a ring could be made of aluminum but holy cow that would be over kill to the Nth degree.
- As an after thought I added a SS eye strap to the back of the ring and another to the plate. This to fix a light line between the 2 to so I keep the cap onboard. Loosing it could be a serious issue real quick.
I was happy to screw the cap on at the end of the job since I could not risk leaving it open to the squirrels. Three hands would have made the installation easier, given the sticky sealant and cool temperature! In the end was tempted to celebrate with a nip of scotch but wisely kept the cap on the bottle considering the long road home. Bob Schimmel.
| INSTALLATION |
Fig 1 - Measure and Dry Fit.
Predrill the mounting holes in the wood ring for #6x1" wood screws.
(Use vinyl ring as template). Tape over the coaming & outline the hole with a pencil.
(Tape prevents chipping & scuffing with jig saw). Drill 3 start holes for the jig saw, (L, T & R). Cut the hole along the pencil line. Drill mounting holes for the rings around the fibreglass hole.
(Use vinyl ring as template). Lower a line through the hole, tossing the end to the port locker. Tie the line to the eye strap on the wood ring and pull ring up to the hole. (Only a partial "cockpit crawl").
|
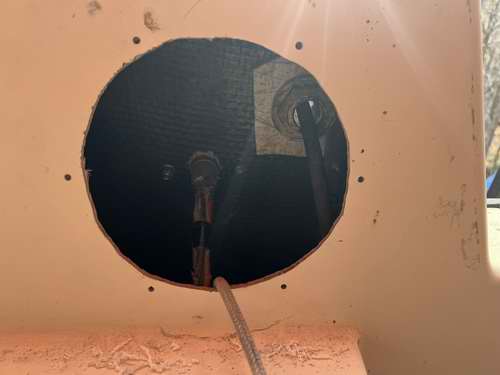
Fig 2 - Align Wood Backing Ring.
Sanitize the backside of hole with acetone.
(I removed lots of black stuff).
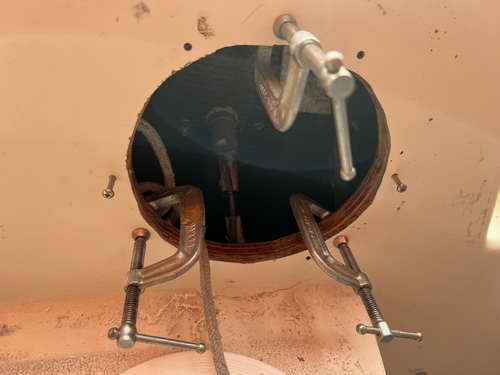
FROM HERE IT GETS A BIT STICKY. Apply a dab of Marine Goop over each screw hole on the backside of the coaming. Spread Marine Goop against the back side of the wood ring and hold it in free air. (Goop spreads evenly over rough surface to spread load). Remove the line from the wood ring and line up the ring holes to the predrilled coaming holes. (Insert a couple 1" Roberts wood screws for alignment). Clamp wood ring to coaming with 3 or more C clamps.
(Let the Goop cure for 30 minutes till it hardens).
|
|
Fig 3 - Align Vinyl Ring.
Spread sealant against backside of vinyl ring.
(Seals ring to coaming to make cockpit water tight). Keep the wood ring against the backside of the coaming while you align the vinyl ring against the front of coaming. (Don't drop the wood ring) Drive the 1" wood screws in, while holding both rings aligned. Once the Marine Goop has spread, remove any sealant that oozed out. (May as well make it look neat).
|
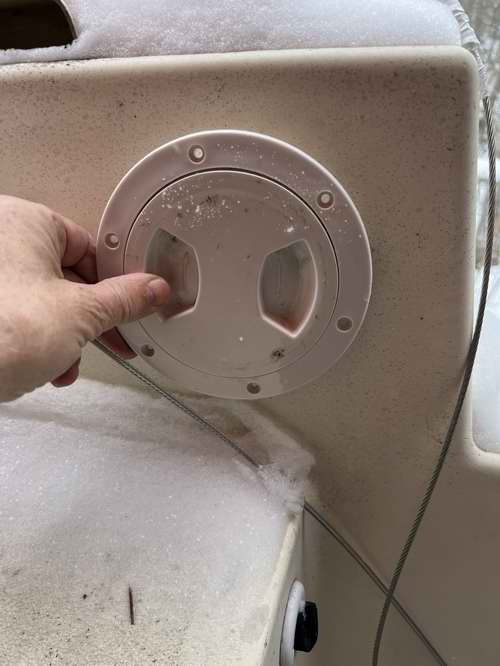
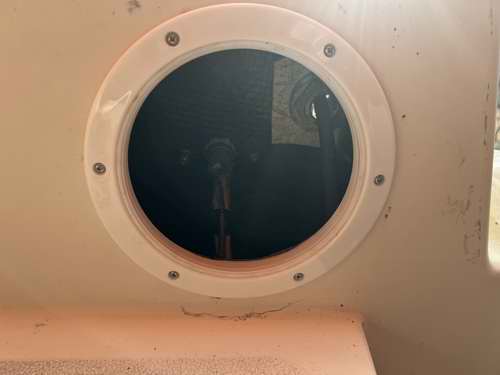
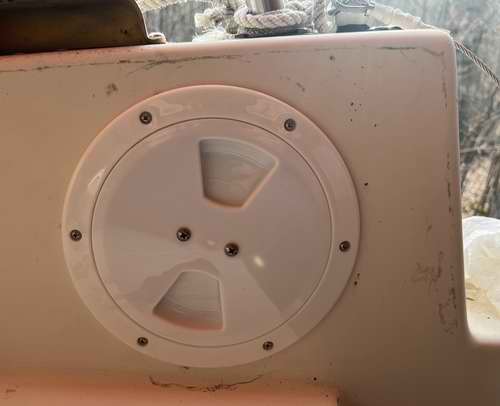
Fig 4 - Installation Complete.
Tie a light retainer line between the eye strap on the wood ring and another on the back of the cap to not loose the plate.
(I don't foresee it falling overboard but .....). Lightly grease the thread to maintain it and keep the seal supple.
|
|
Fig 5 - Line Installed. 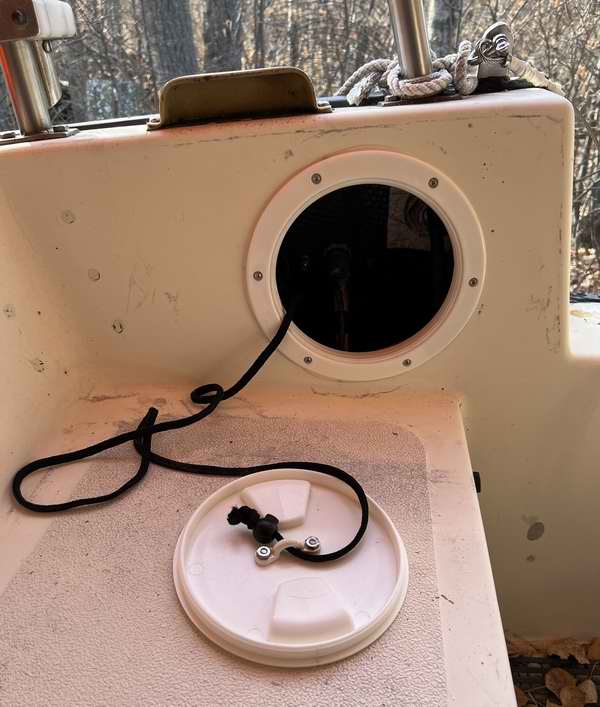
Conclusion - I dry fitted the parts in the cool Fall weather and managed to install the assembly without dropping anything. That was huge given my bulky cool weather clothing preventing me from doing the "cockpit crawl". I kept the Marine Goop warm inside my jacket. The vinyl ring was sealed a week later when it was warm enough for the silicon sealant to flow under the softer vinyl. At the risk of smearing the excess sealant over the gel coat, the hardened bead will be cut away with a razor in Spring. As an after thought I added a SS eye strap to the back of the ring and another to the plate so I could tie a light line between the two. This to ensure the cap stays onboard. Loosing it could be a serious issue in rough weather. Aaaarch. |
NOTE - It's a good idea to check the tightness of the outboard bracket, gudgeons, stanchion and boarding ladder nuts every few years. Resist the temptation to store loose stuff loose under the cockpit as it has a nasty way of sliding into things with each tack, possibly loosening the cockpit drain lines. You'll never find your stuff anyway!
|
 The fleet of aging SJ23 skippers is loosing its ability and desire to do the "cockpit crawl" as described in Tech Tip D03. We are not getting any younger and anything to offset loss of agility to keep us going is welcome.