| SJ23 Tech Tip J10, (Updated 2026-05-18) Daryl Nicholson (Practical Sailor), Glen. | |
|
Free Seized Hardware -
Wrenches, Penetrating Oil, Heat-cold, Anti-seize. |
|
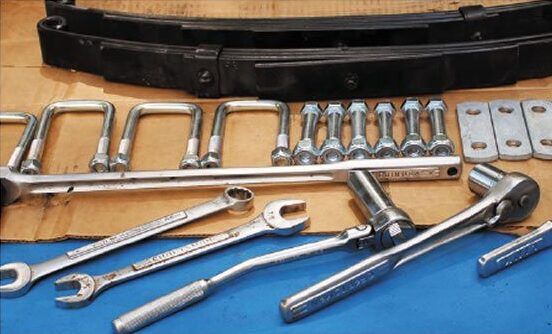 Few people these days know the process of removing a stuck component. This guide from Daryl should help. Few people these days know the process of removing a stuck component. This guide from Daryl should help. Ferrous-metal oxidation can fuse nuts and bolts into seemingly permanent bonds. With hex sockets, penetrating oils, heat-and-cold tactics, you can tackle seized hardware efficiently and safely. The process of ferrous-metal oxidation in which iron, oxygen and water chemically react, can cause rust to seemingly weld fasteners together. This unyielding grip often turns disassembly into an ordeal that may test the air we breathe. But with a few, regularly available products and a set of good wrenches, the big battle becomes a minor squabble. The fastener coercion kit has changed over the years, but the game plan remains the same.
|
|
1. Use A Hex-Socket and Half-Inch Drive To Loosen Nut or Bolt
|
|
| 2. Soak Fastener with Liquid Wrench (Penetrating Oil) If reasonable torque or increasing the torque with a longer handle (breaker bar) doesn’t do the job, I switch to penetrating oil. Typically I’ll scrub away most of the rust with a wire brush and perhaps even use some diluted muriatic acid to dissolve the corrosion.
Note: Smaller-diameter fasteners can be snapped in this process and if that frees the hardware, all is good. But in many cases, breaking a fastener can turn a simple project into a major repair. A common example of this is the hinge assembly bolts on a Catalina 22 swing keel. If these bolts are broken during removal, and you can’t remove the remaining threads, a new hinge retaining assembly (including fibreglass repair to install them) might be required. Even if you can remove the broken bits with a drill-&-tap kit and an easy-out, you have added hours to your project. That’s why its still a good idea to hold back a little on the second attempt, favouring less torque in an effort to keep the fastener intact. |
|
3. Use Heat and ColdWhen necessary, use a combination of heat and cold. Use a propane torch to heat up the surrounding area and expand the metal to loosen the grip. Don’t aim to create a red hot surface, just a moderate heating of the surrounding metal followed with an aerosol dose of PB Blaster or CRC’s Freeze Off on the part I’m trying to remove. Heat expands the surrounding metal, and the cold minutely shrinks the stud. This combination of sprays can be particularly effective. Freeze Off creates a cold surface and adds penetrating oil. The change in temperature also causes enough dimensional change to allow the "PB Blaster" (one of the more effective penetrates we’ve tested) to enter micro fissures around rusted threads to facilitate loosening. |
|
4. Cutting As Last OptionIf none of the efforts mentioned above leads to a success, I look to cutting off the bolt head or splitting the nut with a nut-splitter and driving the fastener out with a drift. Really high-quality hacksaw blades, specialty nut-cutting tools, and various thicknesses of grinder discs all fall into this kit of last resort. Sometimes I use a ball-peen hammer, a small sledge hammer or even a pneumatic impact tool to loosen up a rusty thread-to-thread union, but care must be taken with such heavy-duty bashing. |
|
5. ReassemblyDuring reassembly, coat new threads with graphite grease or a product like "Bostik’s Never-Seez". Its also good to use white Lithium grease in areas where the stickier, more tenacious, heavy-duty coatings are a problem. The threads of the trailer’s screw jack pads also get some white grease; the corner jacks get a dose of "CRC 656" after each post-submersion rinse-down; and the wheel bearings get new grease pumped through the hubs annually. Spray some "Boeshield T-9"
or dribble ATF on electrical connectors before and after a launching or haul out, and the job is done. |
|
|
SJ23 Spar - Kenyon Marine supplied the standing rigging for the SJ23 & other models. They drilled and tapped holes for the stainless fasteners. The fasteners did not receive a bedding compound to prevent oxidation to the aluminum. Stainless steel does not like aluminum very much without a bedding compound, especially in threads cut into the mast extrusion. This removes the anodizing on the mast, which is then quick to re-oxidize and start the corrosion process. Heat the aluminum cleat with your propane torch (may take several rounds) with doses of a lubricant/bolt-release product of your choosing. Know that if the cleat is aluminum, you are battling corrosion over the entire contact surface between the fastener and the cleat, which is a lot of surface area to bind up. The fastener will move only after that bond area is removed. An impact driver (the whack-it- with-a- hammer kind) may give results. Finally, if all else fails, cut off the cleat with a hack-saw, grind the nubbins flush, re-tap and install another cleat in the same area. You can probably cover at least one of the original bolt holes with the base of your new cleat. Leaving the original bolts won't hurt anything. Celebrate those 50 years of age, and bed the new cleat in a bedding compound. PS... If Clark tapped a mast, no compounds were used to lock or ensure release of a threaded fastener. We weren't smart enough for that. However, there were a few places where we would have drilled and tapped; the occasional spinnaker pole car/track on a mast. Glen! |
|
|
Return to Tech Tip Index. . . . . . . . . . . . . . . Have a Question? |
|
 My first attempt is to strong-arm loosen the offending nut or bolt using a hex socket and a half-inch drive. This hex socket mates more effectively with a six-sided nut or bolt and affords more contact surface and less likelihood of deforming
the nut or head of a bolt than an open wrench.
My first attempt is to strong-arm loosen the offending nut or bolt using a hex socket and a half-inch drive. This hex socket mates more effectively with a six-sided nut or bolt and affords more contact surface and less likelihood of deforming
the nut or head of a bolt than an open wrench.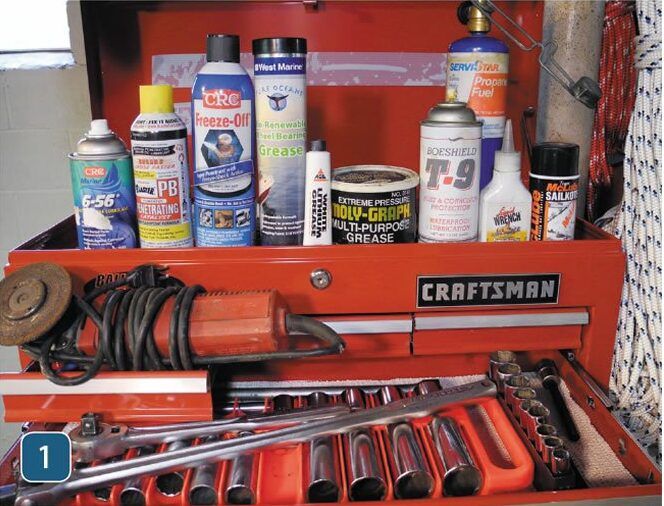 Next, I soak the offending fastener overnight with "Liquid Wrench" and resume the un-loosening process the next day using a breaker bar and socket.